
Tutorial day! This is the first time I am writing a photo-editing tutorial, so please excuse me if something is unclear, and feel free to ask questions in the comment section if you are having troubles going through the workflow! I am using Photoshop CC or CS6 for this and I am assuming you have a basic proficiency. Double check by going to ‘Window > Workspace’ to see if you have the Photography layout enabled, which makes things much easier when editing. For non-Photoshop users, the freeware suite GIMP has similar capabilities, so I am sure you can translate the steps for most of the major advanced photo-editing programs if you want to.
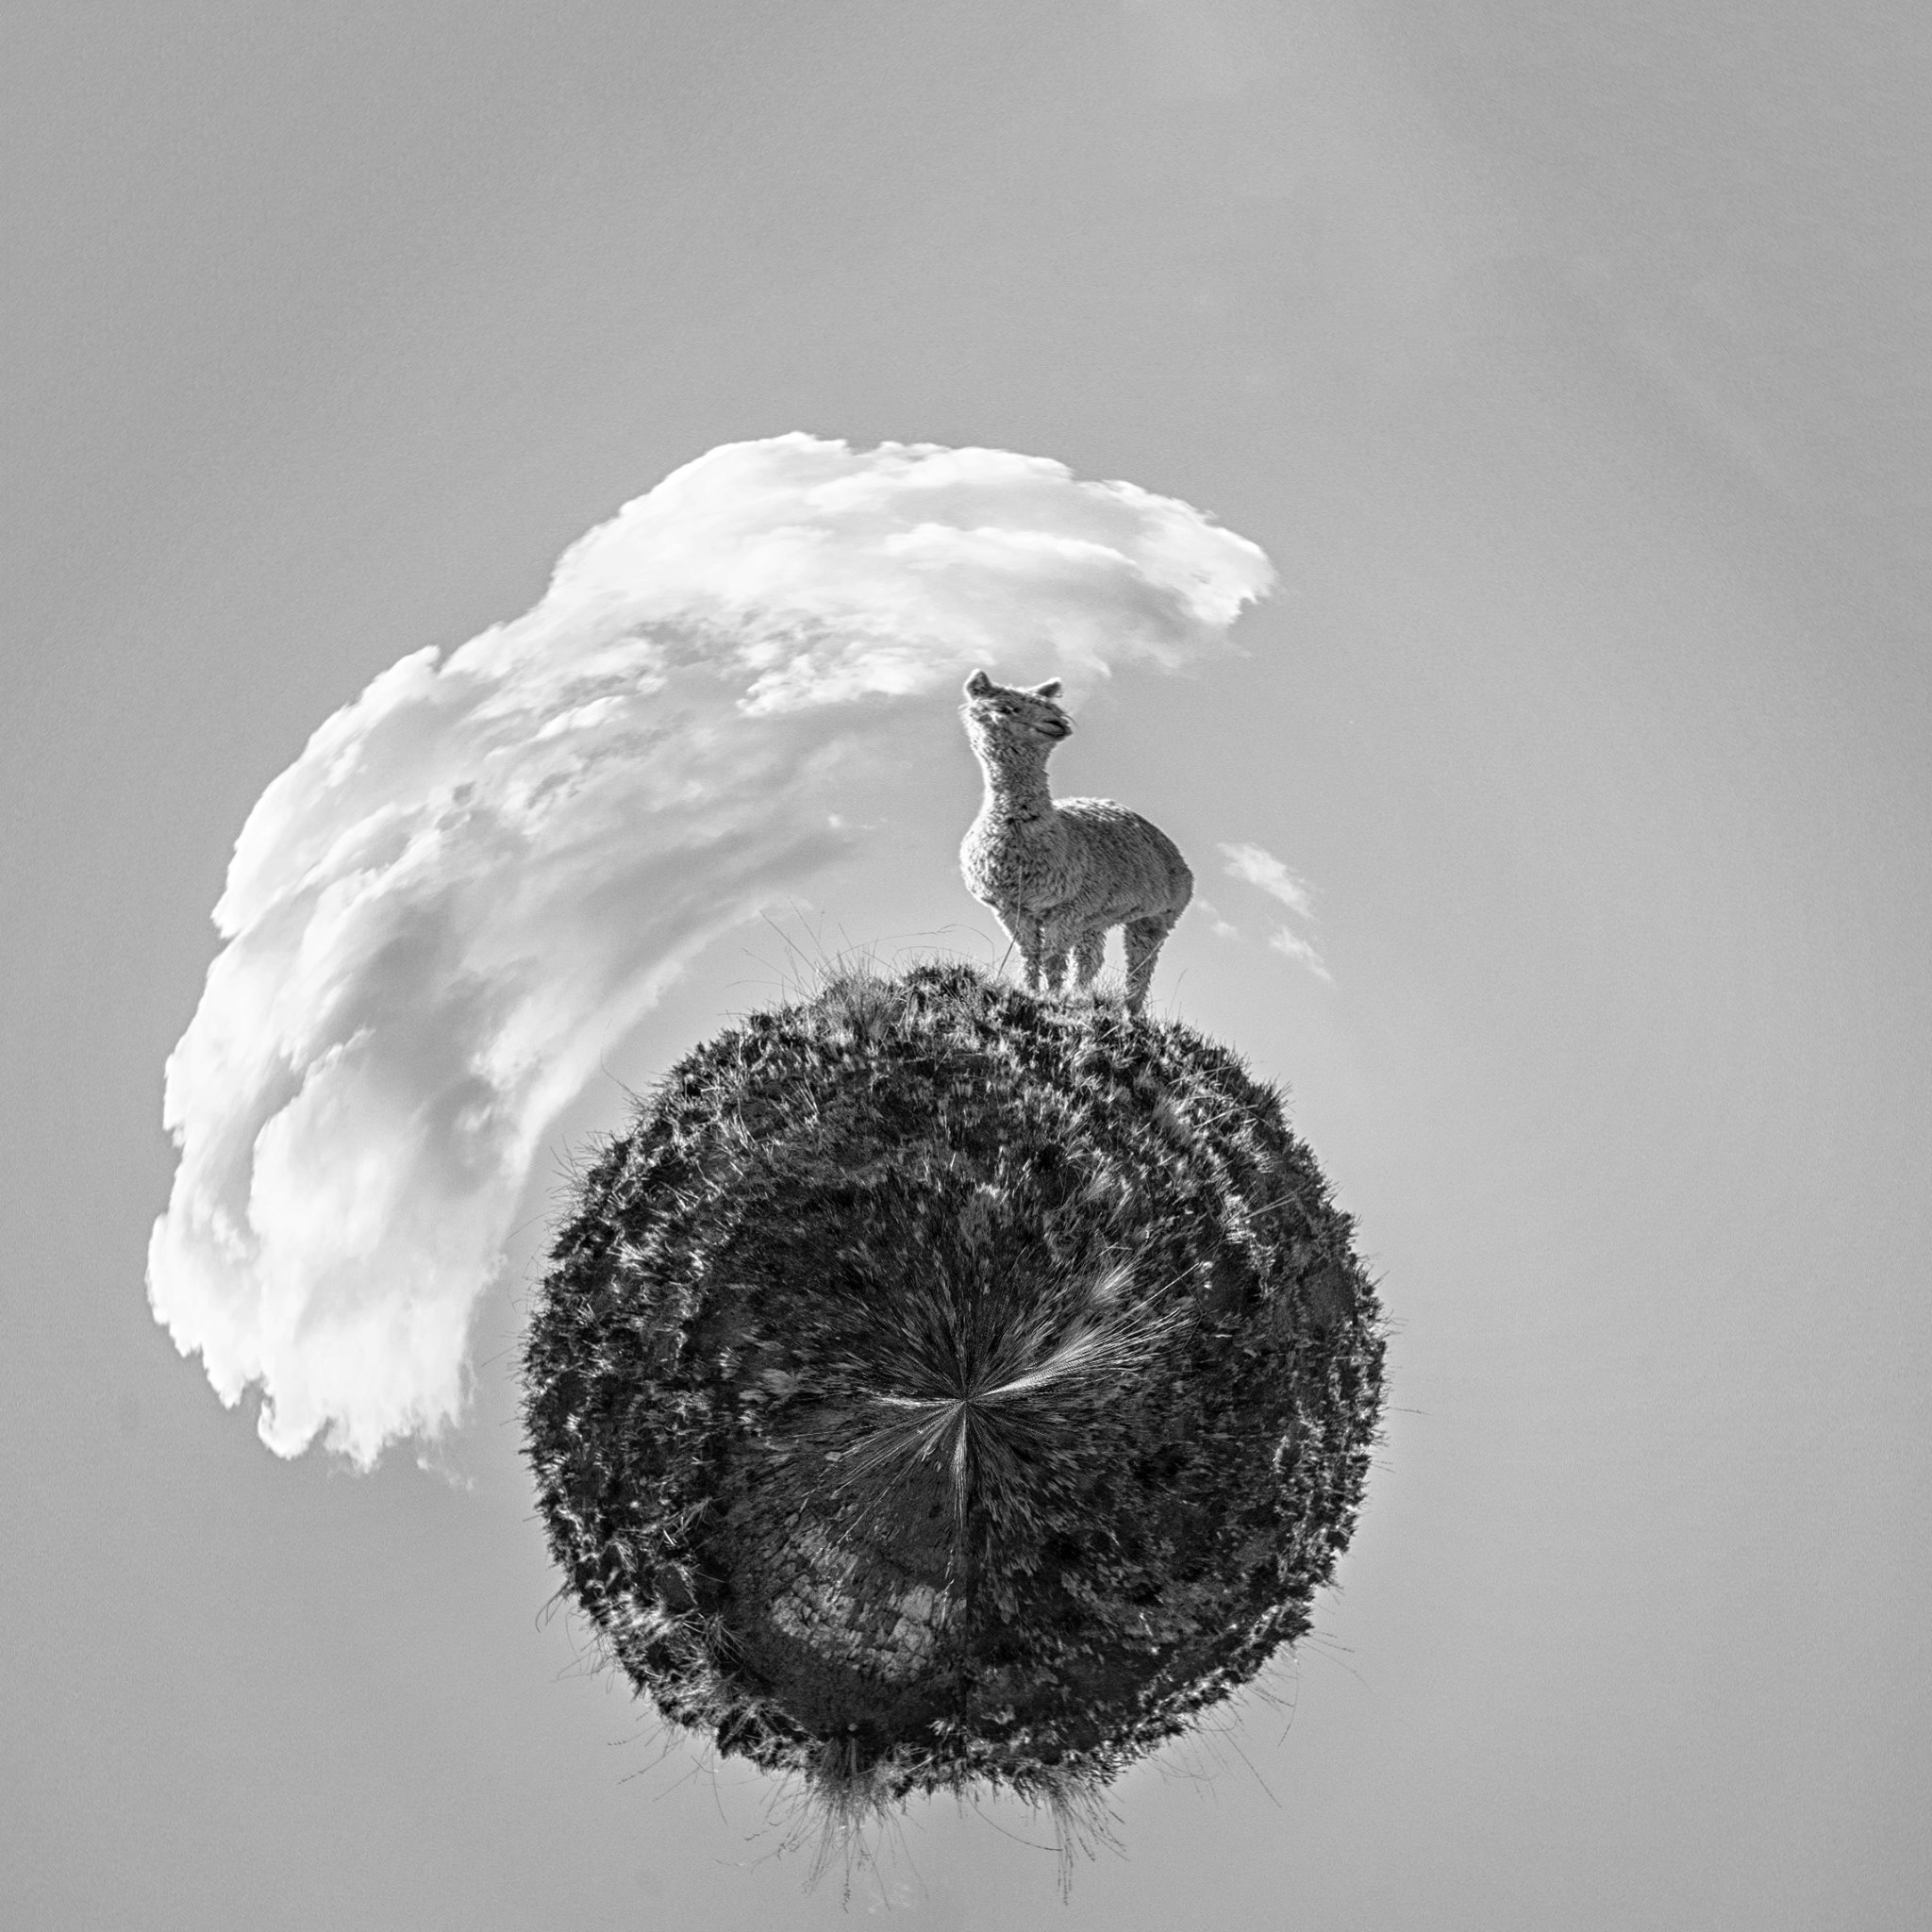
One of my favorite series of short Photoshop edits is polar panoramas, or 360 panoramas, or globes (or a myriad of other names). It is a quick and cool way to make the average panorama -be it wildlife or a cityscape- look unreal and intriguing. Here we go;
I. Choose a picture! Ideally, you will want a panoramic shot that is as wide as possible. The wider, the better the end-result. Composition-wise you want to work with thirds:
- Bottom 1/3: Some plain foreground. Not too much should be going on here because it will be pretty badly warped.
- Middle 2/3: This is the part that will stand out. Go for scenes with a lot of variation in height, like the llama standing out, or some high buildings, trees, mountains… BUT, try to pick a picture in which the right edge is similar to the left edges in terms of structures/colors/height. This will make it much easier and look better too!
- Top 1/3: sky. The more plain and even-lit, the better, but some clouds can have a cool effect too, preferably in the center of your top 1/3.
II. Making it horizontal! Be sure that the border between your middle and top third lines up perfectly on both edges, so your globe will be nice and round in the end. In case you found the perfect picture, but the horizon is just a bit off, you can correct this by going to ‘Image > Image Rotation > Arbitrary’ and wiggle around until you have both ends matching up horizontally. Don’t worry if the rest is slightly tilted, you want the edges to match up for the best effect.
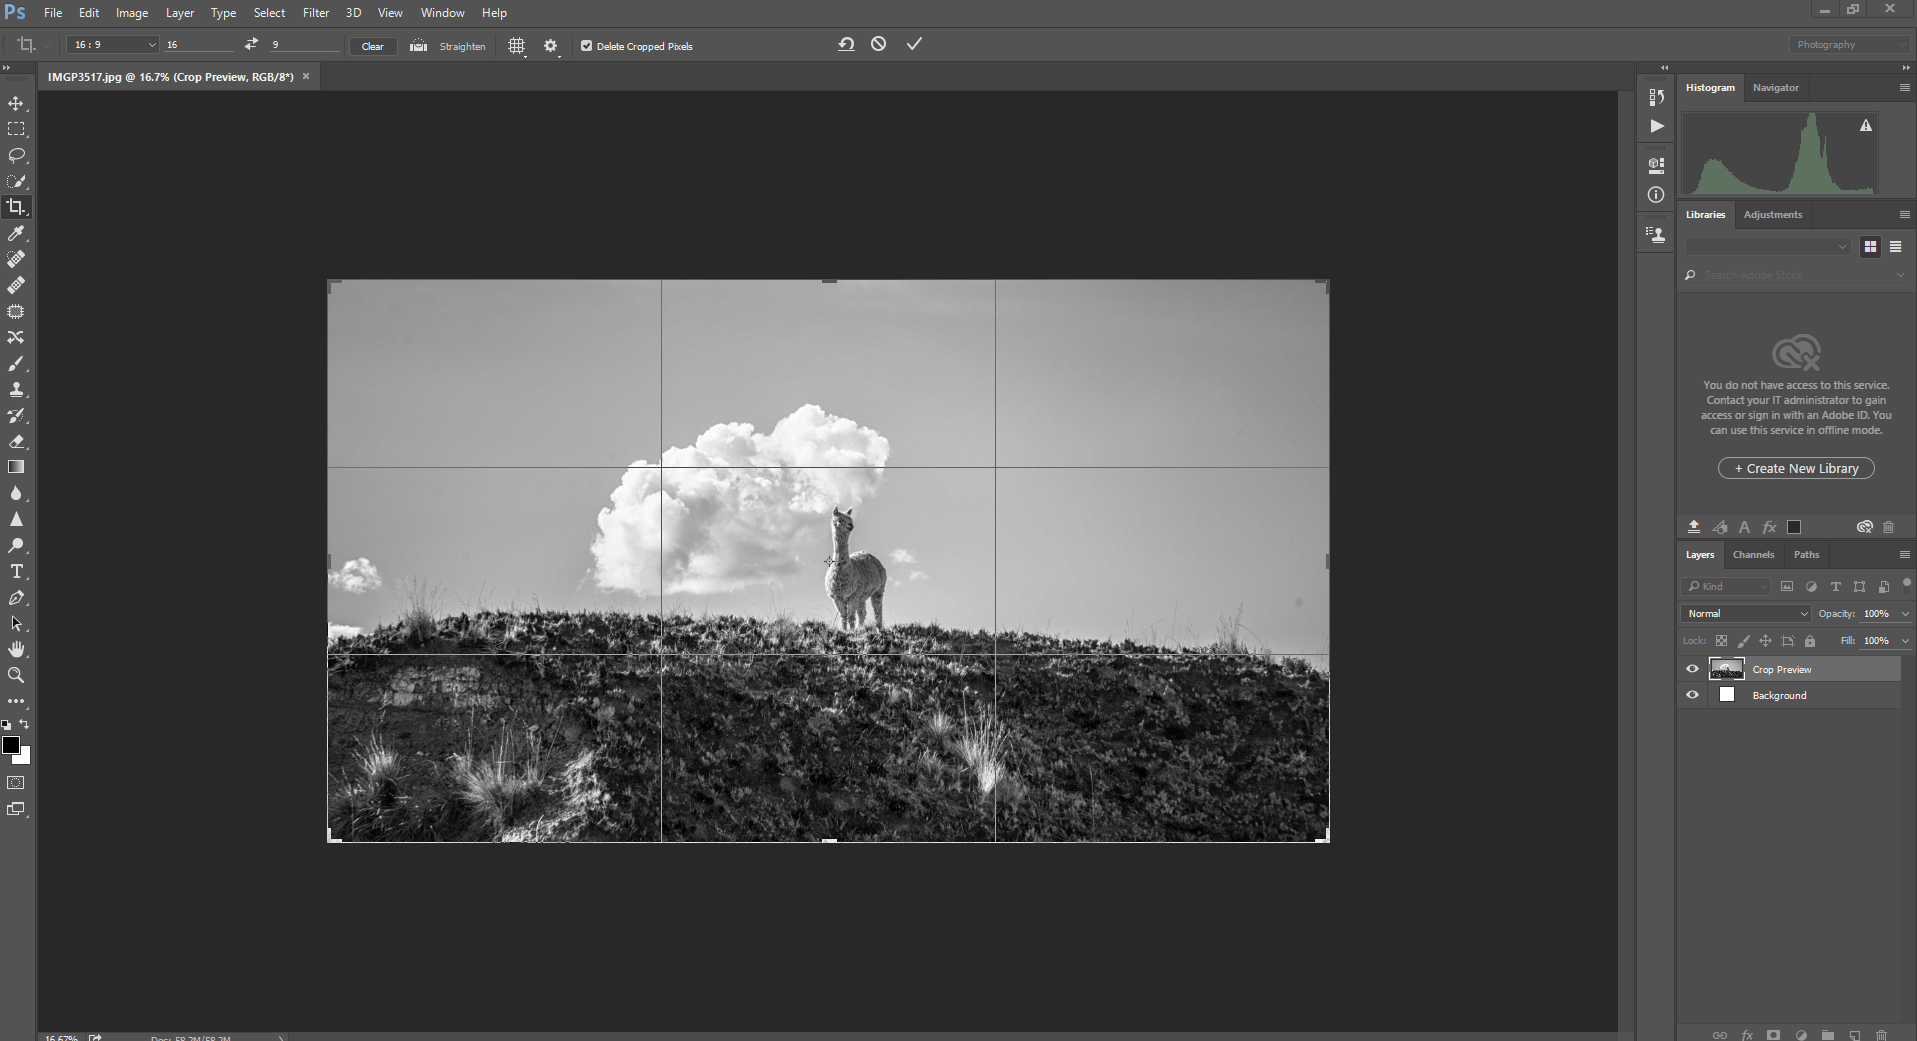
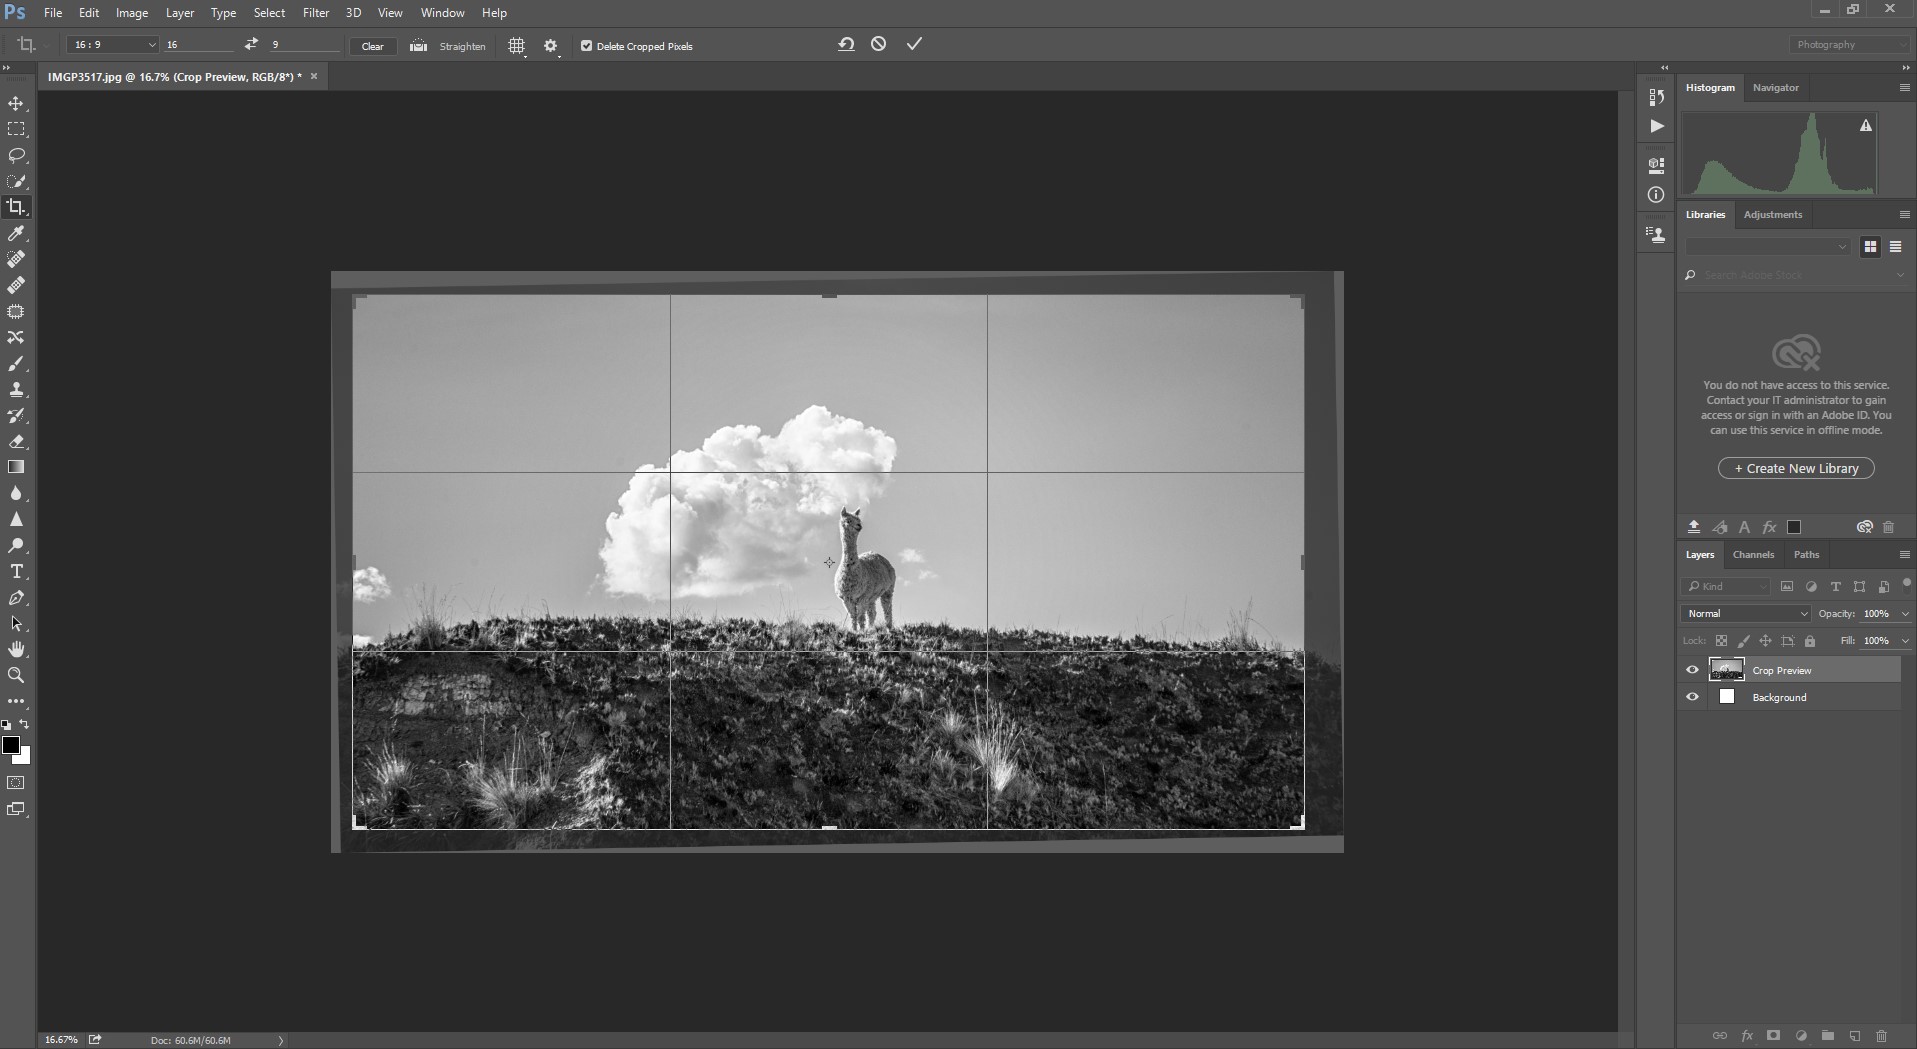
III. If you had to rotate your frame a bit, you need to crop a little bit to make it rectangular again. Use the crop tool (on your left side panel, or press ‘C’ on your keyboard) and make sure you have straight edges again, with your left and right edge lining up. Similarly, you can crop any photo to make it wider, which can potentially enhance the end-result.
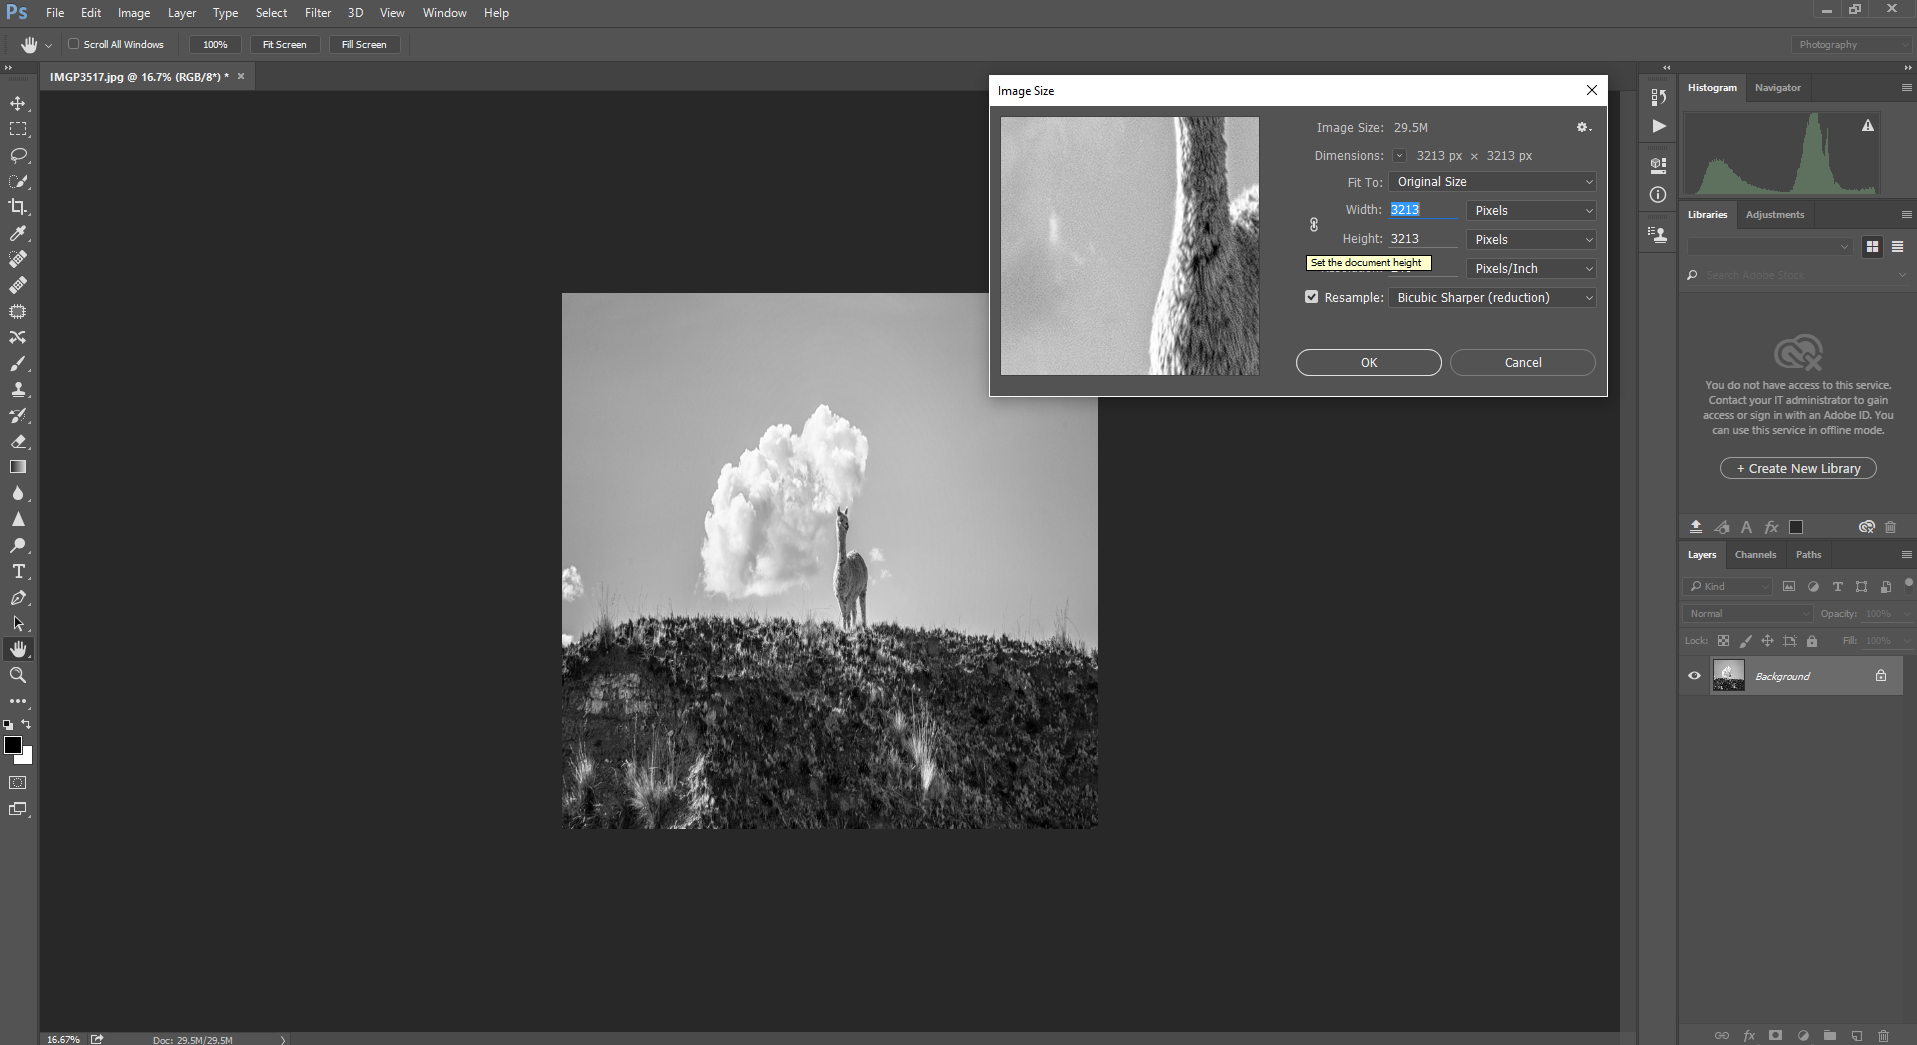
IV. Now we get into editing. Go to ‘Image > Image size’ and make sure you unlink the ‘Width’ and ‘Height’ of your picture so you can change one without the other. Next, set your image width equal to your height (or vice versa) so you end up with a square photograph. Don’t worry if it looks warped!
V. Go to ‘Image > Image Rotation > 180°’ so your image is upside down.

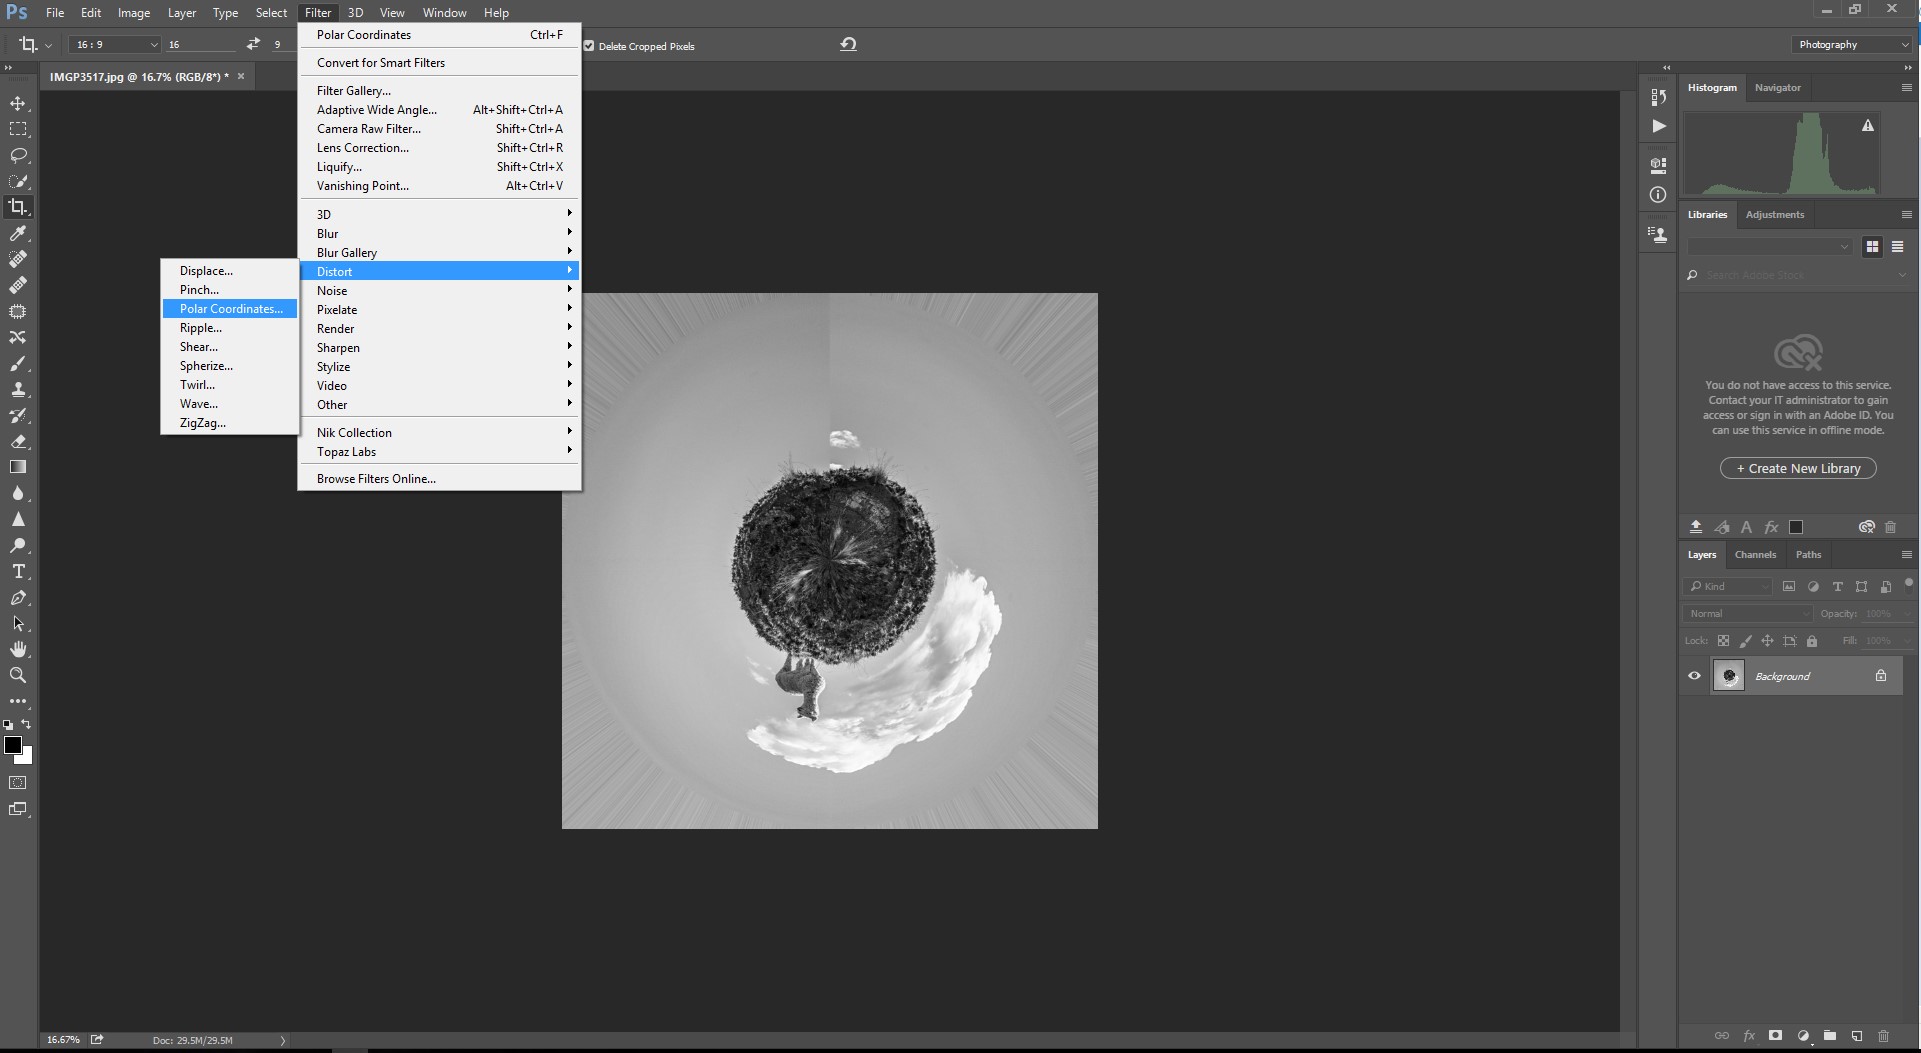
VI. Time to put it in a sphere! Go to ‘Filter > Distort > Polar Coordinates’. Make sure you have ‘Rectangular to Polar’ checked. Click ‘OK.’
VII. Woohoow, sphere! If your ends don’t really match up, try going back a few steps and rotate your panorama a little bit so the edges line up. Sometimes a picture doesn’t really lend itself for creating a sphere, maybe try another picture if you keep having problems to have it line up nicely.

VIII. The next few steps are optional and involve a bit more skill. It is beyond my capability to explain most of it in this short tutorial, but Google is your friend! Feel free to ask for help in the comment section, and I’ll try to link you up with some clear tutorials.
- Most likely you will have some sharp border in your picture where the 2 ends are stitched to each other. You can clean that up by using the ‘Clone Stamp tool’ to smoothen out the boundary by cloning some. Another great way to mask the boundary is with your ‘Lasso’ tool (press ‘L’) and use content-aware filling. This you can do by right-clicking in your lasso loop > Fill > Contents > Content-Aware. Or you can access the Fill menu from the ‘Edit’ tab.
- Crop the overall frame a bit so you get rid of the weird warped outer clouds. Be creative, your globe doesn’t have to be centered!
- Rotate! It can change the look and feel dramatically if Mister Llama is pointing upwards or downwards.
- Color edits … Be creative!

Reblogged this on Windlight Magazine.
LikeLike